Manufactured Stone Veneer Accents for Your Exterior
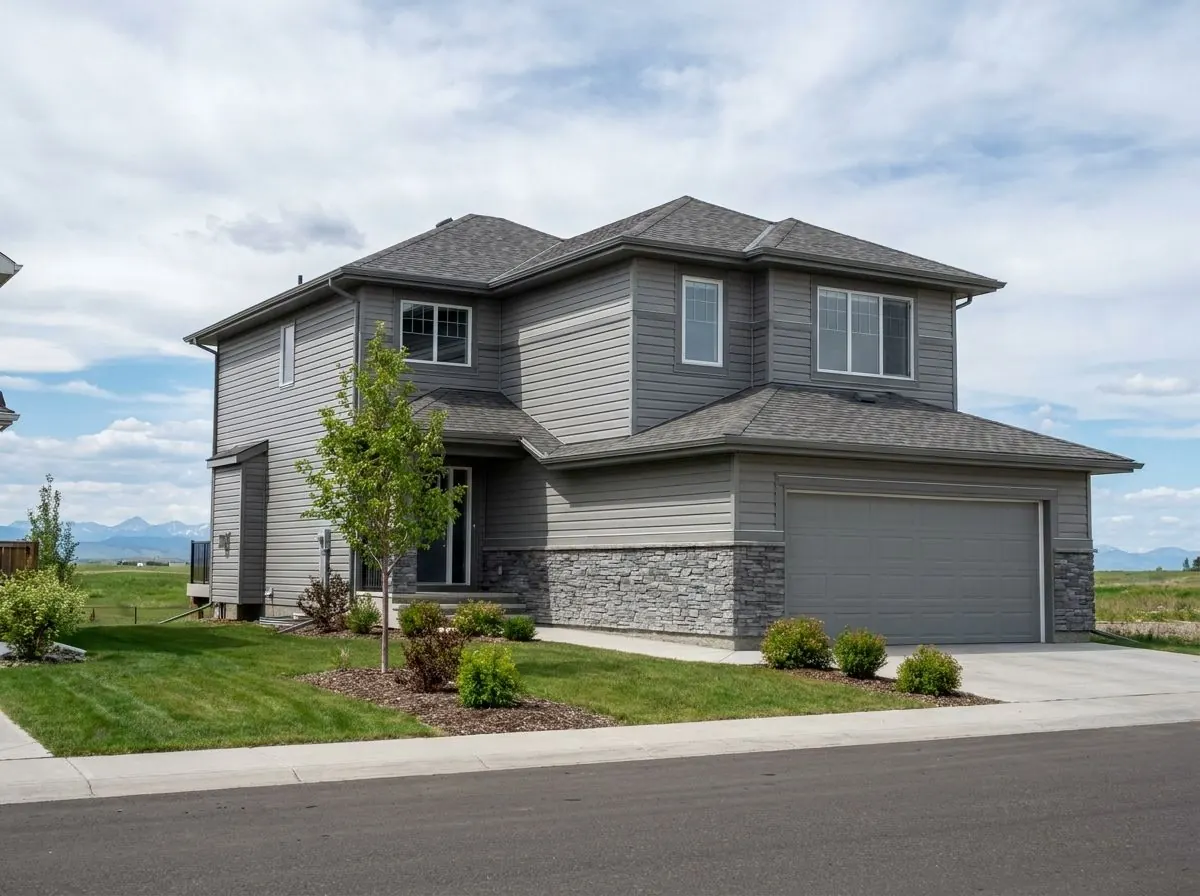
Stone veneer for Calgary homes: manufactured cultured and stacked stone wainscots, entry pillars and column bases, plus real masonry bases. Built over two layers of water-resistive barrier with a weep screed at the base, so the wall behind the stone can drain and dry.
The Problem It Solves
Stone accents on the front of a house look permanent, which is exactly why their problems go unnoticed. The stone face is not what keeps water out of the wall. Water finds its way behind any veneer at joints, edges and penetrations, and if the layers behind the stone cannot carry it out at the bottom, it sits against the sheathing. By the time a homeowner sees loose stones, stains at the base or soft trim beside a pillar, the sheathing behind can already be damaged.
The failures we find tend to cluster at the edges. At the base, stone runs straight down into soil or mulch, with no weep screed, or landscaping and a new patio have been built up over the screed that was there. At the top of a wainscot, siding above sheds water straight into the top of the stone with no flashing between them. Above a column or beside a garage, a roof edge dumps water onto the stone because there is no kickout flashing. Each is a small detail, and each can rot a wall.
Calgary adds its own stresses. The City of Calgary’s climate-ready guide says stone is resistant to fire and will not be damaged by high winds, but is susceptible to cracks from freezing and thawing. Much of the installation advice online is written for other climates and other codes, and we did not find Alberta-specific guidance on adhered stone veneer. That leaves homeowners comparing contractors who each describe the wall behind the stone differently, with little to judge them by.
How It Works
Manufactured stone is an adhered veneer, not a Section 9.20. masonry wall, and it is built as a layered drainage system. On frame walls, the Cultured Stone manufacturer’s instructions, written to ASTM C1780, call for two layers of water-resistive barrier over the sheathing, then lath that is self-furred or held off with furring fasteners, then a scratch coat, then stone set in mortar. The same instructions note that a rain screen may be added as an option.
The base and the edges are where the system drains. The manufacturer notes that most building codes require a weep screed in framed applications, with clearances to grade and paving measured from it, and calls for corrosion-resistant flashing or weep screed and a means of drainage at all penetrations. We add flashing where siding above meets the top of the stone, over openings, and kickout flashing where a roof edge meets the wall.
For a real stone or brick base, a full masonry veneer is built under Section 9.20. of the building code instead. Over a wood-frame wall it needs at least a 25 mm air space behind the veneer and weep holes no more than 800 mm apart at the bottom of the cavity and above lintels, with flashing beneath them. A masonry veneer built to that section also counts as a capillary break.
How the Job Runs, Step by Step
Plan heights and drainage first
Before choosing a stone, we set how high the wainscot runs relative to finished grade, walkways, patios and planned landscaping, and where the weep screed sits, so the base stays clear once the yard is finished.
Open the wall and repair
Existing siding or failed stone comes off in the work area. We inspect the sheathing, replace soft or stained sections, and trace any water damage to its source, whether a missing kickout, a window head or a buried base.
Two barrier layers and flashings
Two layers of water-resistive barrier go on, lapped upper over lower. Flashing goes in at the top of the stone where siding continues above, over openings and at roof-wall intersections, then the weep screed at the base.
Lath and scratch coat
Lath goes on self-furred or held off the barrier with furring fasteners, fastened as the stone manufacturer’s instructions specify. The scratch coat follows and is allowed to set before stone is laid.
Set stone, then protect the base
Stones are set in mortar and the joints finished. We seal where the stone meets windows and doors, keep drainage gaps open, and confirm that final grade and paving sit below the screed.
What Decides the Specification
The first choice is between adhered manufactured stone and full masonry. Adhered stone goes onto a framed wall through lath and mortar, which makes it the usual option for wainscots, pillars and accents added to an existing house. Full masonry veneer is a separate construction under Section 9.20., with solid units at least 75 mm thick and an air space behind, and it suits a new build or a base designed for it from the start. Within manufactured stone, the profile is a design decision: tight stacked stone reads modern, while fieldstone and ledgestone read more traditional. Availability of each profile and colour depends on the manufacturer and supplier.
The second driver is everything around the stone. Where the wainscot stops, the siding above needs its own flashing and trim to shed water past the stone, and that detail changes with the cladding, whether fibre cement lap, vinyl or aluminum plank. Snow shovelled against a front wainscot, downspouts discharging near a pillar and irrigation spraying the base all put more water on the veneer, so we look at them before deciding how high the stone should run and where the screed goes.
Alberta Code Notes
Alberta currently enforces the National Building Code – 2023 Alberta Edition. Section 9.20. covers masonry veneer, including the air space and weep hole requirements above. Adhered manufactured stone is not a Section 9.20. masonry veneer, and we did not find Alberta-specific guidance for it, so we install it to ASTM C1780 and the stone manufacturer’s instructions, over two layers of water-resistive barrier with a weep screed at the base. The authority having jurisdiction may have its own expectations, and we confirm them. Either way, the wall still needs the two planes of protection the code requires, and sealant between cladding and window and door frames.
Adding stone where there was siding is a change of cladding on that part of the wall, so Alberta’s permit exemption for re-siding with a similar type of siding may not apply, and structural or sheathing repairs can also change the answer. The City of Calgary treats exterior renovations case by case. In Okotoks, where minor exterior repairs are exempt, larger work is confirmed with the Town first, and in Chestermere the City decides. We check before work starts.
General guidance only. The authority having jurisdiction and the product’s own evaluation report decide what applies to your job.
Around Calgary
Stone accents often appear on front elevations in Calgary’s newer suburbs, though every street differs. In southwest communities like Evergreen and Bridlewood, largely built through the 2000s, and in southeast communities like Auburn Bay and Mahogany, a front elevation may pair builder siding with a stone wainscot, garage-front pillars or a stone-wrapped entry column. Where landscaping has since been raised or a patio poured against the wall, the base is the first place we look. Stone-fronted homes in Okotoks and Chestermere get the same check.
Often Done Alongside
HardieBoard Vertical Board & Batten
HardiePanel vertical siding and HardieTrim battens over a furred cavity
Weather-Resistive Barrier (WRB) & Housewrap
Tyvek, building paper or self-adhered membrane, lapped, taped and flashed.
HardieBoard & HardiePlank Lap Siding
Smooth or wood-grain fibre cement lap planks, laid out course by course
Where We Do This Work
Stone Veneer: Questions We Get
Can stone veneer go straight over my existing siding?
What is the metal strip along the bottom of my stone?
How does stone veneer handle Calgary hail and winters?
Do I need a permit to add stone to the front of my house?
How do I know the siding was installed properly?
Considering Stone Veneer?
Call Calgary Siding Solutions or send the details. We will look at the job, tell you whether stone veneer is the right fix, and price it in writing.